coast defense

Masthead Image

Coast Artillery Fire Control

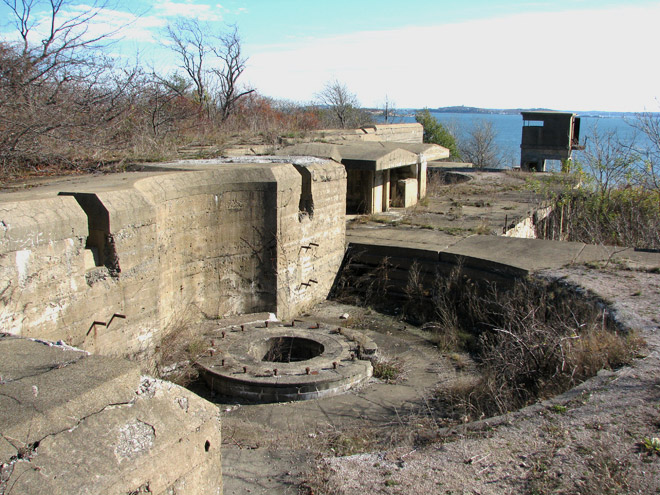
Many of the sites that were once involved in coast defense were related to do with some aspect of fire control for the Coast Artillery. This page provides a summary of the Coast Artillery fire control system, making use of links to articles on Wikipedia written by the author. Fire control sites can often be readily identified today because their locations were accurately surveyed and were marked by brass disks or other means that have survived to the present.

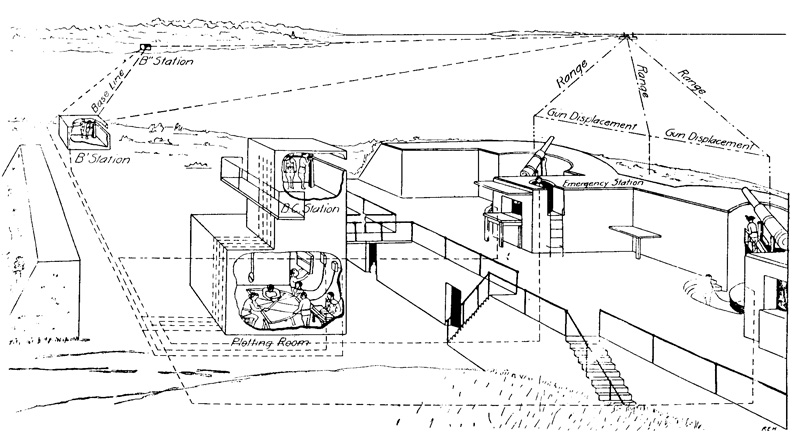
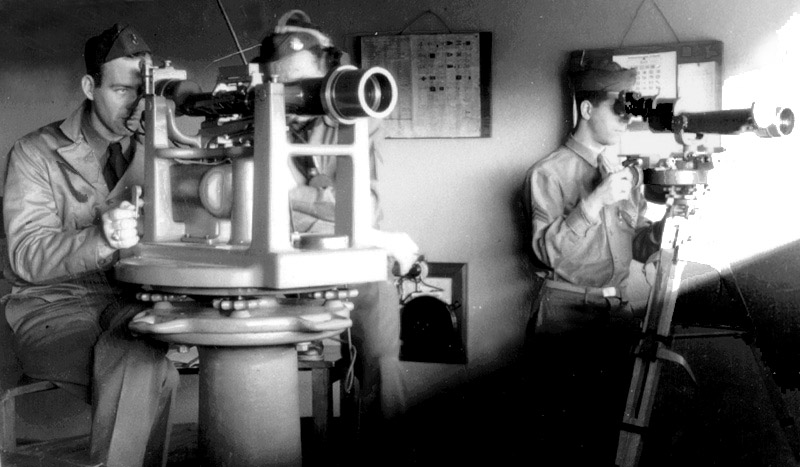
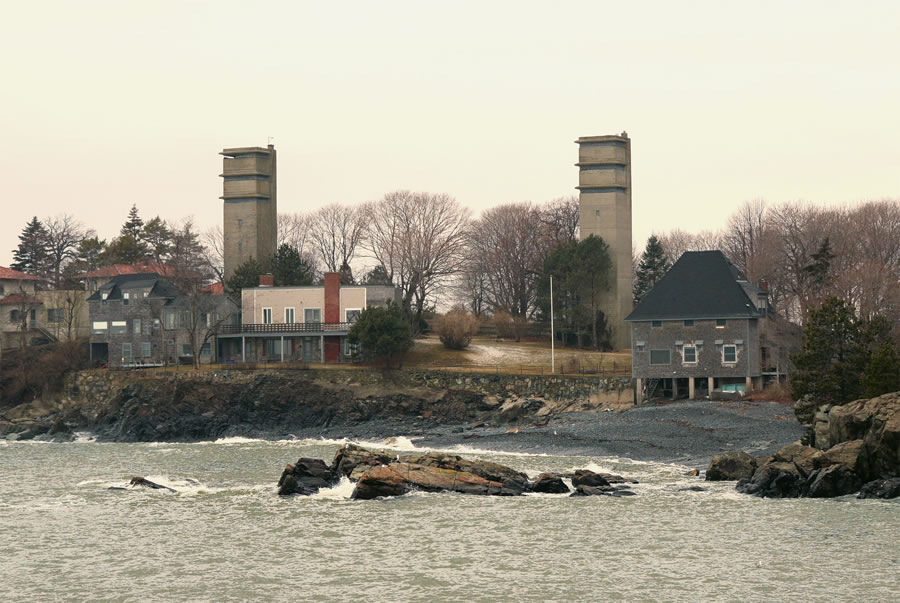
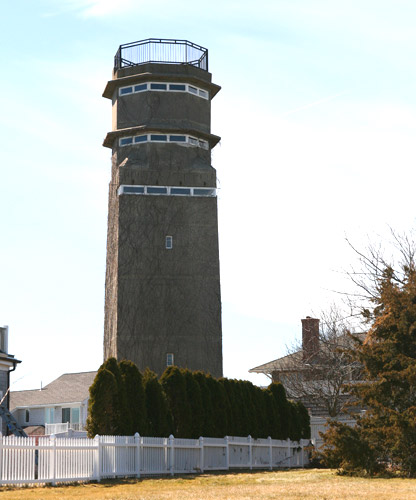
A key part in the fire control system was played by the base end stations that were spread out along the coast near the harbors being defended. Sometimes these base end stations took up several floors in a tall fire control tower, where they might be stacked up one on top of another. In other cases, these stations were single observation posts, located in small concrete bunkers or even in "manholes," pillboxes buried in the ground that were barely large enough for one or two people. [NOTE]

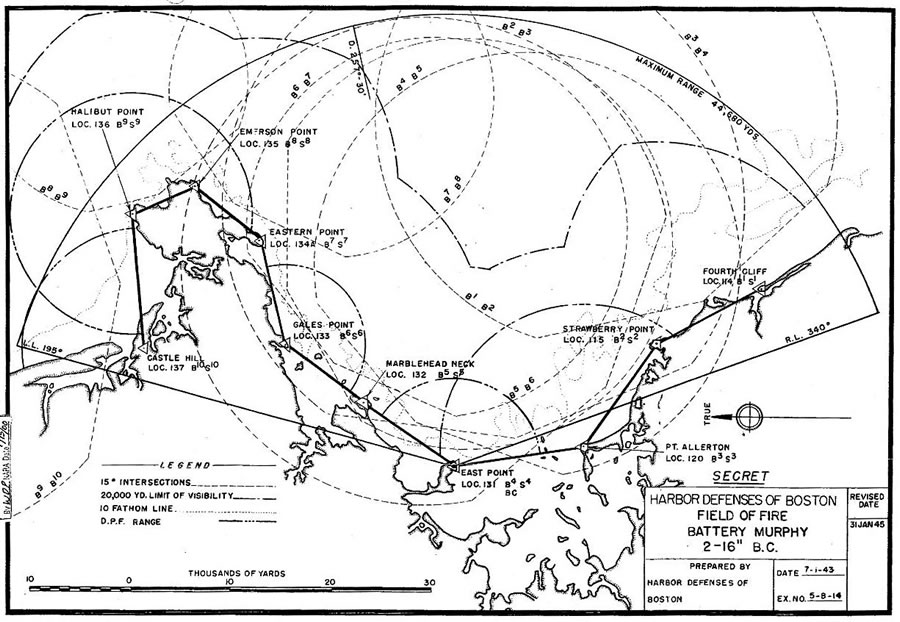
What base end stations had in common was that they sat at either end of precisely measured baselines that ran between them, and the coordinates of their observing instruments had been accurately surveyed. This meant that if the bearing angles from two of these stations to a distant target ship were measured (since the length of the line between them was precisely known), then the mathematical process called triangulation could be used to calculate the coordinates of the target ship (in terms of latitude and longitude or a point on the X-Y map grid that had been established for each harbor). [NOTE]

Prior to WW2, and in the early years of that war, observations from the base end stations were telephoned in to a plotting room, where a plotting board was used to figure out the firing data (range and azimuth) for a battery of guns firing on a specific target. A similar procedure was used to fire mortars or the submarine mines that protected the harbors. The plotting board was a mechanical device (with lockable brass arms, pivots, dials and indicators) which represented an analog of the territory near a specified Coast Artillery battery. Manipulating this board produced firing coordinates that could be telephoned to the battery commander and used to aim the guns. The target was tracked over time, and corrected firing data could be produced, accounting for factors like wind speed and direction or spotting the actual fall of fire (over, short, left, or right).

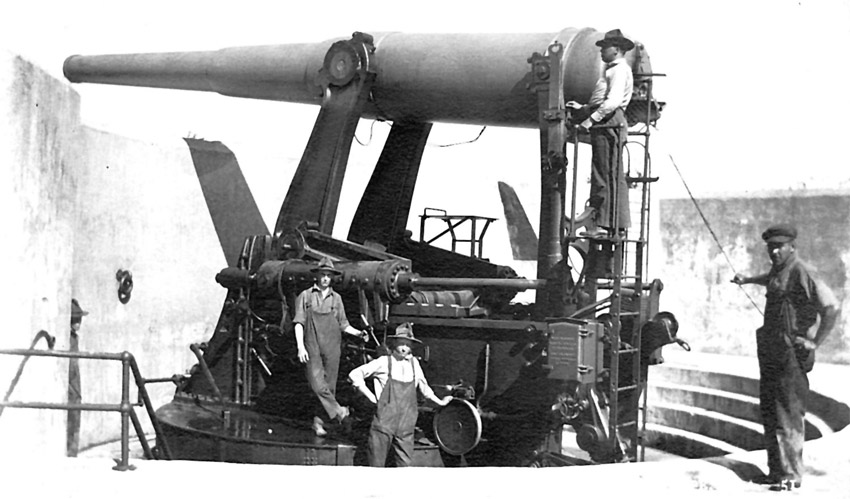
Actually, the ploting board produced firing data that referred to one specified geographic location near the battery, known as the directing point of the guns. This point was sometimes marked by a survey disk or mark and was sometimes the "pintle center" of the No. 1 gun in the battery (the one on the right, as it faced the sea). Then, depending on the separation among the guns, firing coordinates had to be further adjusted to apply to each individual gun.

Later in WW2, firing coordinates could be produced by feeding observations from the base end stations (or from fire control rader stations) directly into gun data computers, electro-mechanical devices that replaced the plotting boards.

Elements of the Fire Control System

  • Battery Fire Control
    This diagram shows all the elements of fire control for a Coast Artillery battery. Two base end stations and the baseline between them are shown at upper left. The two guns and their directing point (midway between them) are at right. At center-left is the plotting room, with its semi-circular potting board, and the Battery Commander's station, which often had its own observing instrument, is above the plotting room
  • DPF And Azimuth Scope-R
    On the left is a depression position finder (DPF), and on the right is an azimuth telescope. The DPF could measure the bearing angle to the target and also its range from the station. The azimuth scope could only measure bearings. Either or both of these instruments was usually present in a base end station or observation post.
  • Hitchcock-Gun-1-Looking-E
    This is the pit for Gun 1 of Btty Hitchcock at Ft. Strong, Long Island, Boston Harbor. A Battery Commander's station for nearby Btty Ward is shown in the distance. Such a station often contained its own observing instrument. An armored door can be seen hanging open at the rear of that station. A so-called "disappearing gun" was mounted here; it "disappeared" below the parapet for loading and then swung back up (into "battery") when ready to fire. The next slide shows such a gun.
  • 10-inch-1896-DC-sml
    Gun 1 of Btty Hitchcock, shown in the previous slide, was this type of weapon, a 10-inch gun mounted on a disappearing carriage. By WW2, these guns had been declared obselete. A sighting telescope, which in an emergency could be used instead of the fire control system, was placed on the standard in front of the man standing at top. The man at right holds the firing lanyard. It appears these men are mechanics posed with the gun.
  • Nahant-Twin-Towers
    These two fire control towers contained half a dozen base end and observation stations, stacked up on top of each other in the higher levels of the towers. The towers are now privately owned but look just as they did during WW2.
  • Murphy-FOF
    This chart shows the 10 base end stations of Battery Murphy, the two 16-inch guns at East Point in Nahant, MA during WW2. Station 1 (Fourth Cliff) is at right and Station 10 (Castle Hill) at left (almost into New Hampshire). The baseline segments are shown between each pair of stations. As a target moved along the coast, it would be tracked by several stations and could be fired upon utilizing any convenient baseline.
  • Seaside Farther
    This privately-owned fire control tower is also little-changed since WW2. It dominates the southern approaches to Boston Harbor. A geodetic disk marking the centers of its observing instruments in the top three levels is embedded in its roof.
  • View Northwesterly
    This breathtaking panorama shows Boston Harbor as seen from the roof of the Pt. Allerton fire control tower (see previous slide). The coastline of Hull is at left. Beyond is the causeway to Long Island, with the bright white Long Island standpipe at center-right. Ft. Warren (on Georges Istand) is at right. The foreground shows Nantasket Roads, the southern channel into Boston Habor and the Fore River shipyard in Qunicy.